Re-gauging and backdating a Bachmann
On30 Porter to On3 and late 1890's era

After reading Boone Morrison's fine article "Wider is better" in the May/June 2000 NGSL Gazette, I set about converting my Bachmann Porter to 3' gauge. Having a small switching loco such as the Porter running around the Elk Valley Lumber Co. seemed to me to be an ideal use for it.

My On30 Porter before re-gauging on HO-scale track.

The first thing to do was to widen the driver spacing and this was done using part of a NWSL axle puller (without its hex screw), the jig that I built for my On30 Climax conversion and my vertical drill press with a 0.077" diameter (2mm) drill bit loaded into it upside down. In this manner, I was able to push the axles through the drivers using the shank of the drill bit. Unbelievably, this seemingly unorthodox arrangement worked very well indeed. Note that I couldn't use my NWSL axle puller to do all of the work because it was designed to pull a 0.093" diameter axle (or larger) and was therefore too big for the 0.077" diameter stock axle sets. The trick to re-gauging in this manner was to push one driver out to "half On3" first, checking with a digital calliper. Once one driver was completed, it was easy to push the other one out while constantly checking the overall gauge with an NMRA On3 standards gauge.

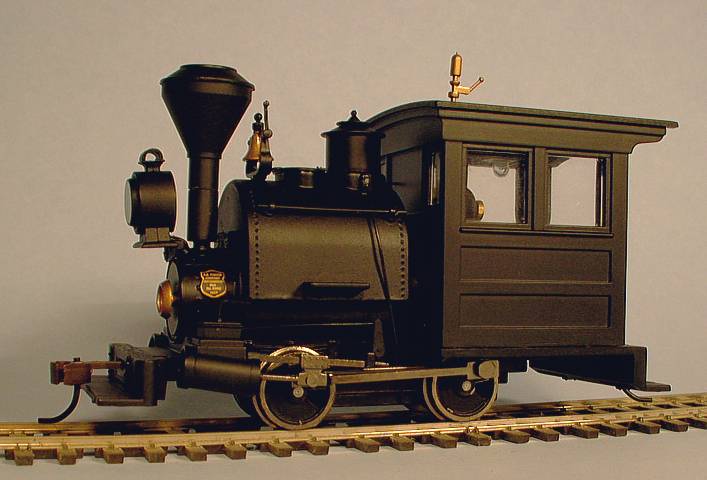
In disassembling my Porter, I was amazed to see that the connecting rod holes had been filed. Since my Porter was a new product, this had to have been done at the time of manufacturing in China and most likely to correct driver quartering errors. I'll come back to this later.

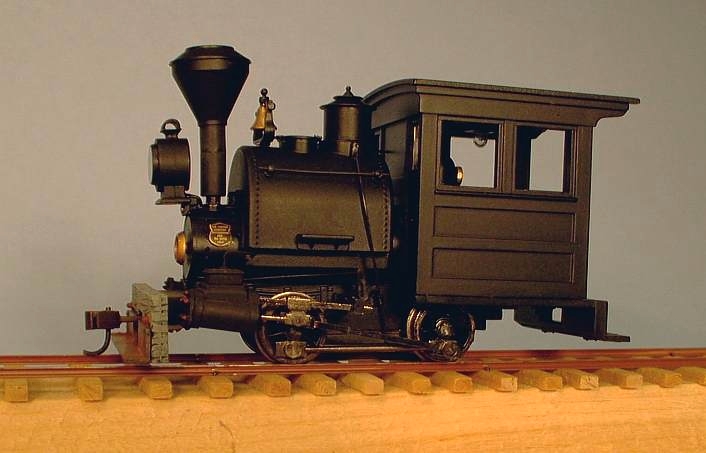
After checking the final gauge with an NMRA On3 standards gauge, I applied a small drop of epoxy resin to the axle ends. Note that it was not necessary to re-quarter the drivers after conversion.

My On3 Porter after re-gauging, resting on my On3 test track.

Widening the drivers was only part of the re-gauging work. Wider spaced drivers meant that the cylinders had to be further apart as well. To do this, I built a new the cylinder saddle from styrene and added the Backwoods Miniatures die cast pilot beams and two cylinder covers (all four parts were from their Porter "dress-up" kit) which added much needed weight to the loco for improved electrical pickup. As well, because the cylinders were now further apart, it was necessary to widen both cross-head guide yokes.

I was surprised how well the finished model ran. After bending the driver wipers further apart, my Porter ran reasonably smoothly although on closer inspection I did notice that she tended to waddle at the rear end as she travelled down my test track (no adverse comments here, guys). After a lot of thought, I stripped the loco down and re-tested the drivers for eccentricity and found that they were perfect. Next, I checked the drivers for proper quartering and found that they were not quartered properly at all. Well, well, that's why the drive rods were filed at the factory. Another mystery solved.

I reassembled the loco again and now she runs runs minus the waddle. Success! I can only imagine that after she's broken in, she'll run even more smoothly. I plan to use more of the "dress up" kit when I start the back dating project (new stack, tool boxes etc.) plus a white metal engineer and fireman. In all, these will add much needed weight to the model and improve electrical pick up.

Now with my Porter successfully re-gauged to 3', the most difficult part is behind me and I can now turn my attention to the remaining items.

Click on the arrow below to see the links for the remainder of this construction project or here to see part 2.

Click on the arrow to return  Click to go back or here  Click to return to Chris' On3 home page to return to Chris' On3 home page.
Last updated: February 2011