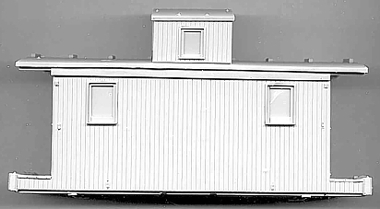
The photo opposite is the Sn3 version of this kit and will be updated later as I complete the resin On3 model.

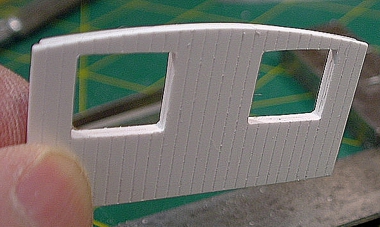
I wanted the walls to be a scale 4" thick (or 0.080" in O-scale) and decided on two thicknesses of 0.040" scribed styrene. In the prototype, the siding was installed vertically outside and horizontally inside. I did the same.
The inside walls were cut first and the roof curve was filed. I then carefully marked out the position of the windows with a sharp 2H pencil. Once I was happy with their locations, I carefully cut out the openings. I actually did this a few times and scrapped any pieces that I wasn't happy with. Scrapping work pieces that I've spend 2 weeks working on might seem like extreme behaviour but at the end of the day, if it isn't right, it isn't acceptable. End of story.
You don't need very expensive tools for this work - a sharp X-acto knife, steel ruler, cutting mat, needle files (flat, square and triangular), 2H pencil, small engineers square and lots of patience. You also need to appreciate that even though you mark out a square hole, you're actually working in 3-dimensions at the same time...
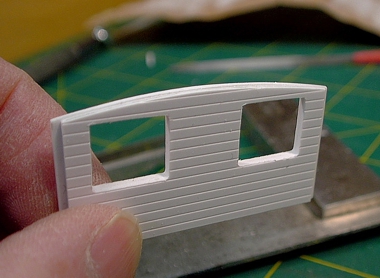
I used a similar construction technique for the main body walls.
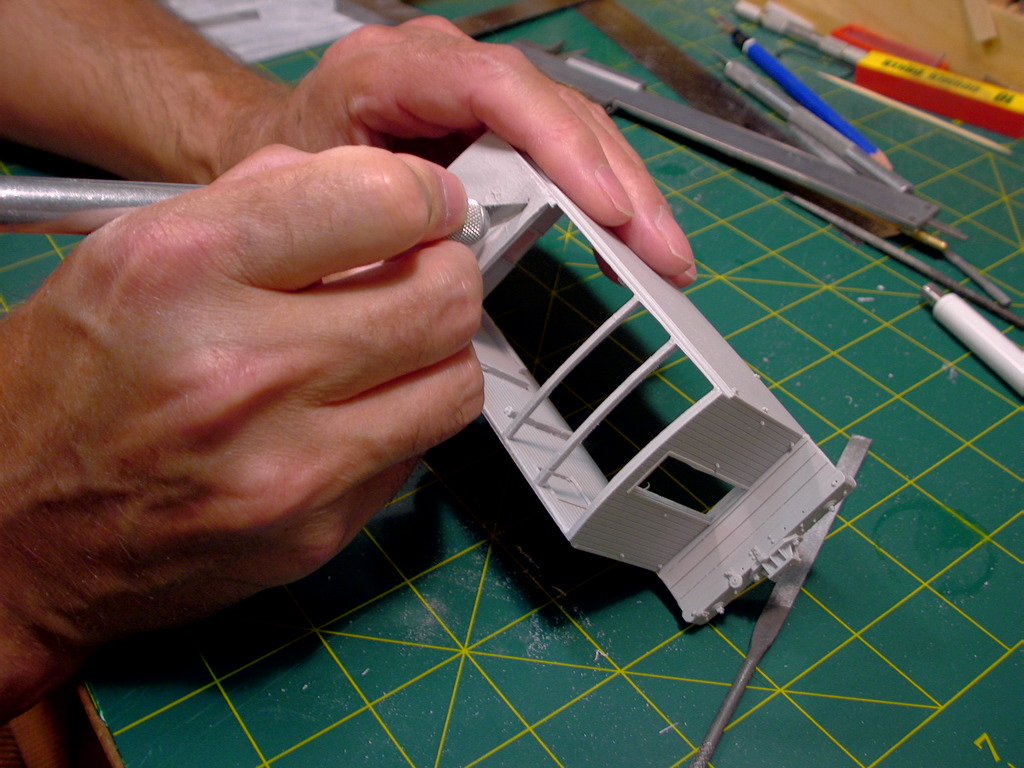
Once the styrene work was finished, a series of moulds were made from the master parts.
Note the grab iron detail on the roof and body sides. Each window consists of 9 individual pieces, all cut and filed to an exact size! This car has a total of 9 windows. I'll leave you to visualise the cutting and filing... At their tops, the window trim pieces are bevelled with a prototypical 45 degree angle.
The Cimarron Works kit comes complete with detailed and illustrated instructions.
Careful with that axe, Eugene...
Note the fancy arched roof supports and the highly detailed end beams. The door openings are finished with scale trim and even have door jambs. Cool or what?
To be completed, please stay tuned...
 or here
  to return to the Railroading Corner home page.